
Make This Stunning DIY Holiday Centerpiece in 15 Minutes Flat
Denise Vasi
The holidays are around the corner, and hosting for an intimate group is even more special this year. If you’re not already considering what your dinner table is going to look like, it’s time to put some thought into it with this easy DIY holiday centerpiece.
Plan your menu, pick out your table linens, read this article on how to set your dinner table, and put your DIY skills to work to create a show-stopping centerpiece.
I tapped Erin of White Fig Designs to walk us through how to create a stunning floral centerpiece fit for a holiday dinner table. Not only is this project a lot easier than you might suspect, the act of creating this centerpiece might just bring some unexpected (but much-needed) tranquility. Keep scrolling for an easy DIY that’ll bring your table to life, impress your guests, and save you a ton of money.

Gather Your Supplies
When you cook, you start with your mise en place. Making this DIY holiday centerpiece is very similar. Have everything you need on-hand before you get started to keep things stress-free. In addition to a sharp pair of flower clippers (or, in a pinch, kitchen shears), here’s what you’ll need to get started making the perfect DIY holiday centerpiece.
A Vessel
Anything can be a vessel. If you don’t have something that speaks to you in your home, try finding a unique piece at a thrift store. Keep in mind, you don’t want to distract from the flower arrangement you’re creating, so choose something simple yet chic.
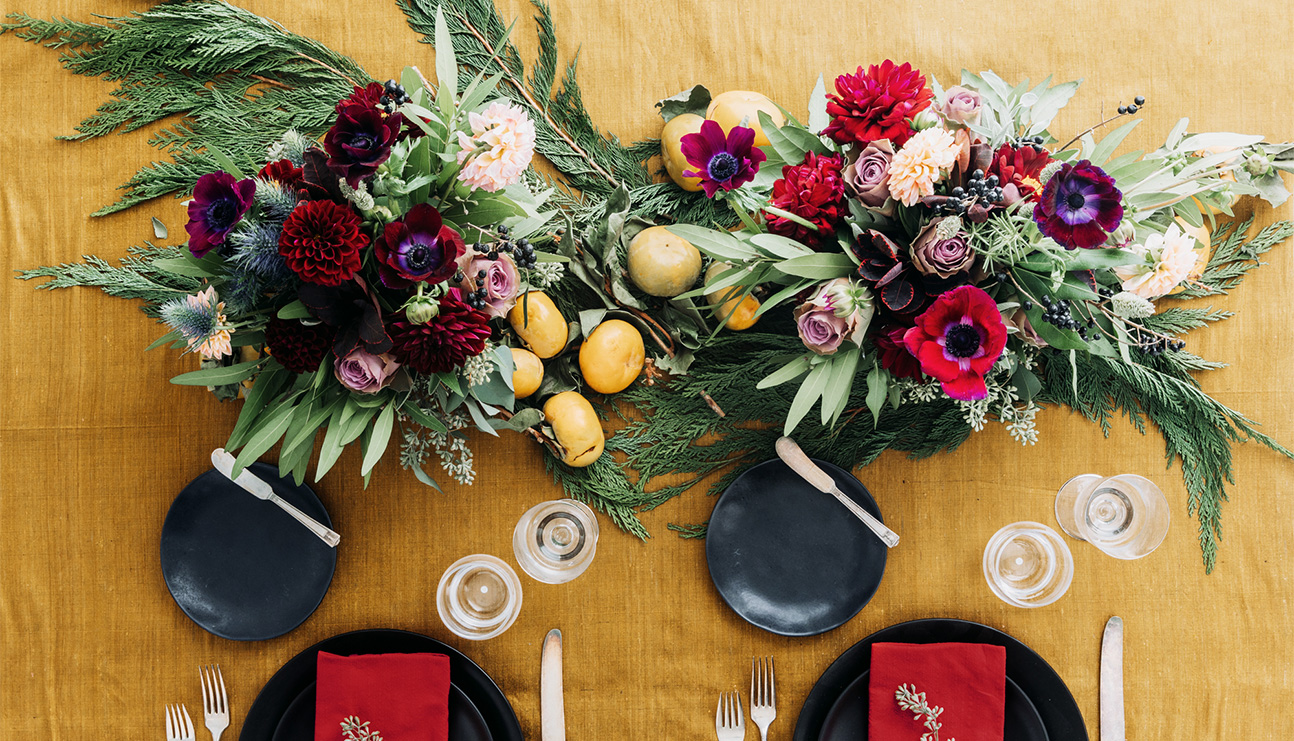
Avoid anything too tall. The holidays are all about connecting and it can be hard to do that when a ginormous floral arrangement is in the way. Erin suggests opting for two or three smaller arrangements instead so the focal point isn’t right at the center of the table. Alternatively, you can make one short, long arrangement that spans the length of your table.
Flowers and Greenery
Here in L.A., we’re lucky to have an abundance of flowers and greenery available in our yards year-round. But even if you’re in a colder climate, you can use what you have right outside your door: think sprigs of evergreens and pinecones.
Creating a DIY holiday flower arrangement for a dinner party is a little bit different from creating an arrangement for your living room or bedroom. Erin pointed out that fragrant flowers and aromatic greens have the ability to complement the foods you’re serving or distract from them. Consider using herbs like bay leaves, sage, and rosemary, that vibe with your meal.
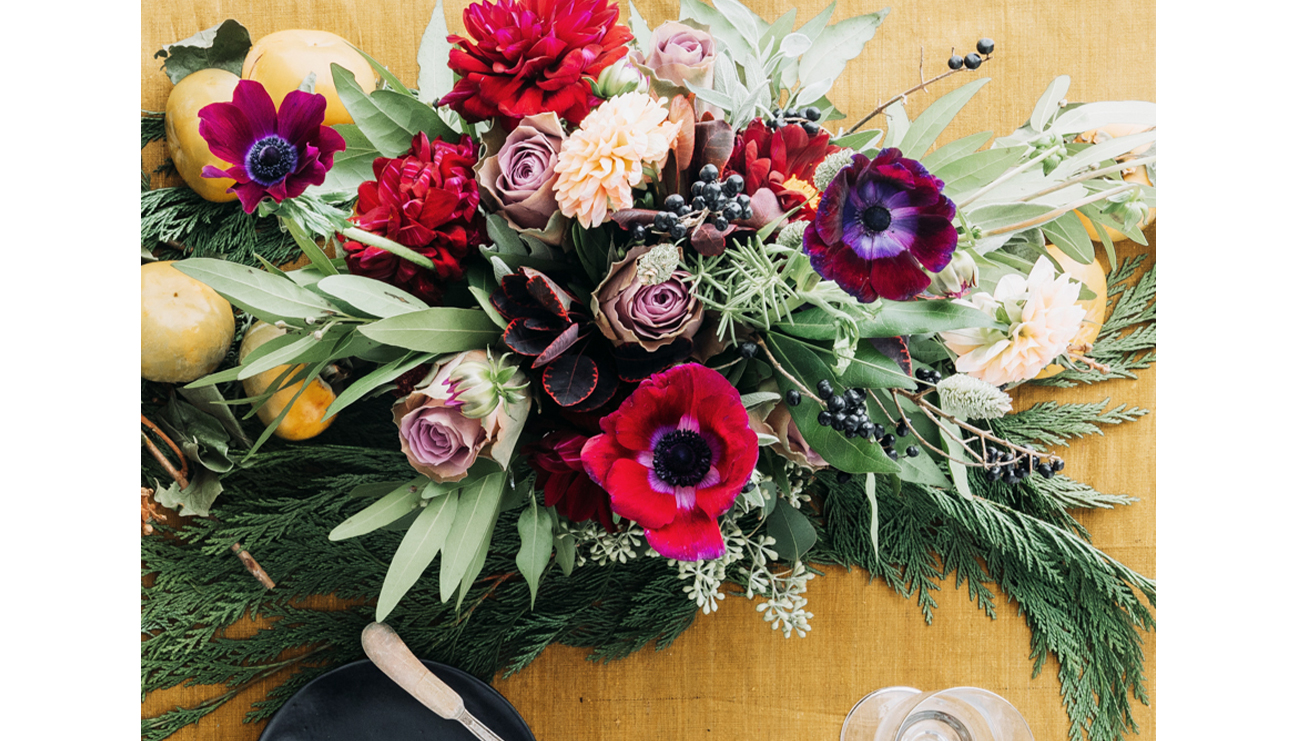
If you don’t have enough greenery and flowers in your yard for a complete arrangement, hit up Whole Foods, Trader Joe’s, or your local farmers market. Pick three main colors: the greenery plus two key flower colors. Then, incorporate two additional accent colors. This is your chance to flex some creativity, but if you’re loving what Erin created for my holiday table, here’s what we used:
Florals:
- Dahlias
- Anemones
- Roses
- Thistle
- A touch of wheat
- Amaranthus
- Blue viburnum berries
Greens:
- Bay leaves
- Sage
- Rosemary
- Seeded eucalyptus
- Burgundy cotinus
For the Table:
- Christmas greens
- Persimmons
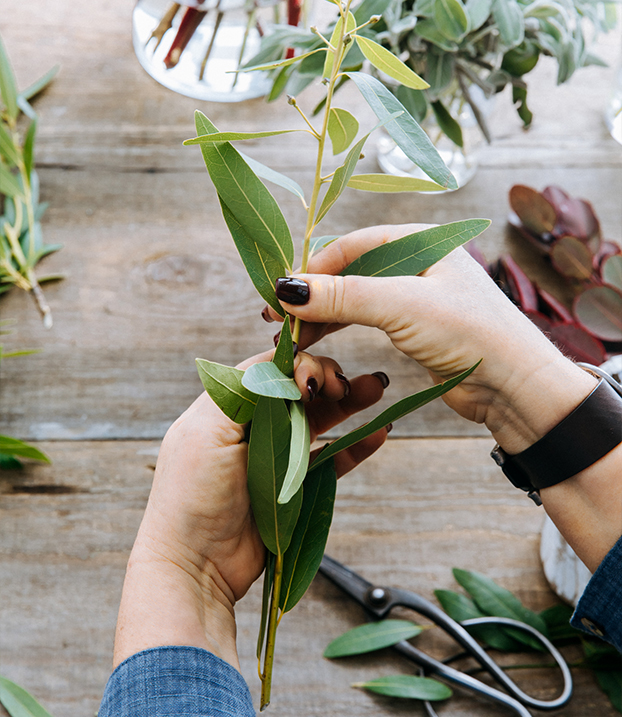
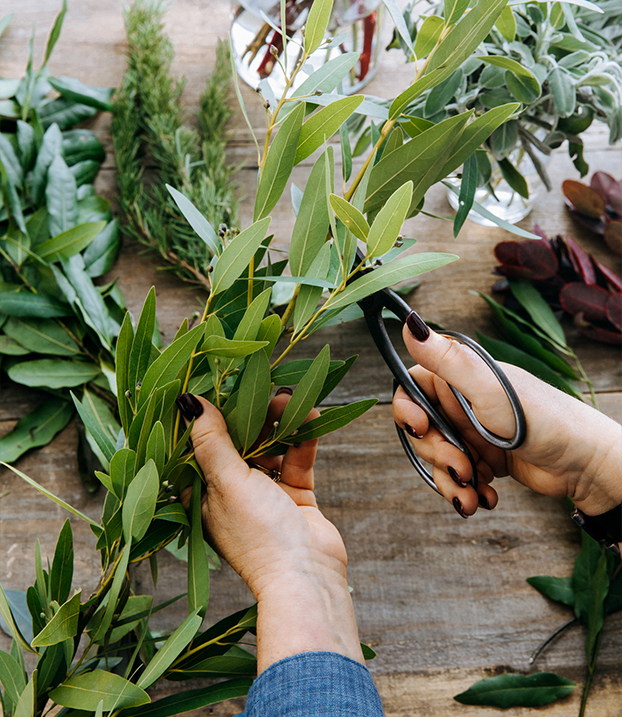
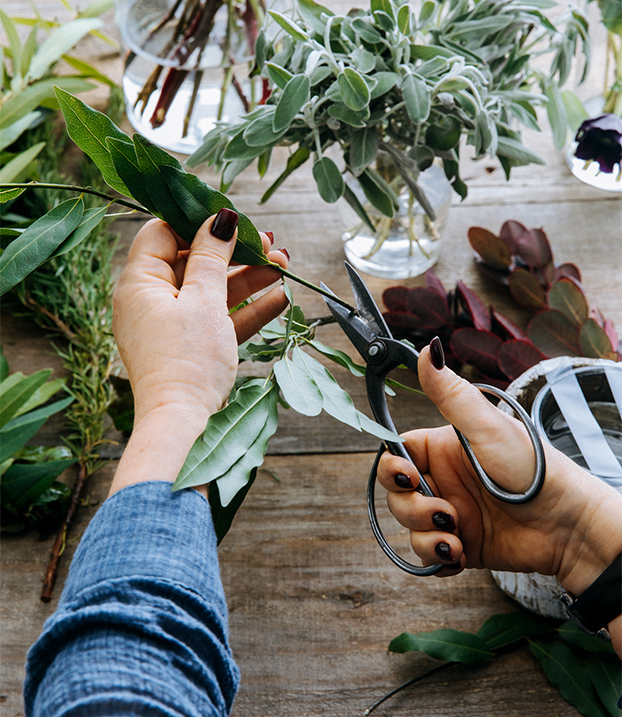
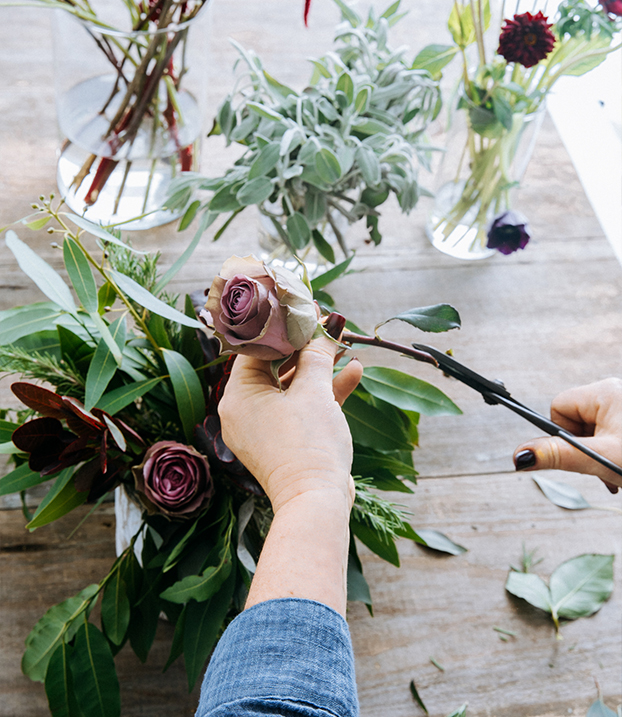
Once you’ve gathered your flowers and greens and you’re ready to start. Cut all of the stems at an angle. This gives them more surface area to absorb water, keeping them looking their best for longer. When you’re cutting, keep in mind that you want a variety of heights for a more natural feel. Hold each stem up to your vessel to get an idea of where to make your cuts. Pull off any leaves that would be below the waterline—leaves in the water breed bacteria, which shortens the lifespan of your arrangement.


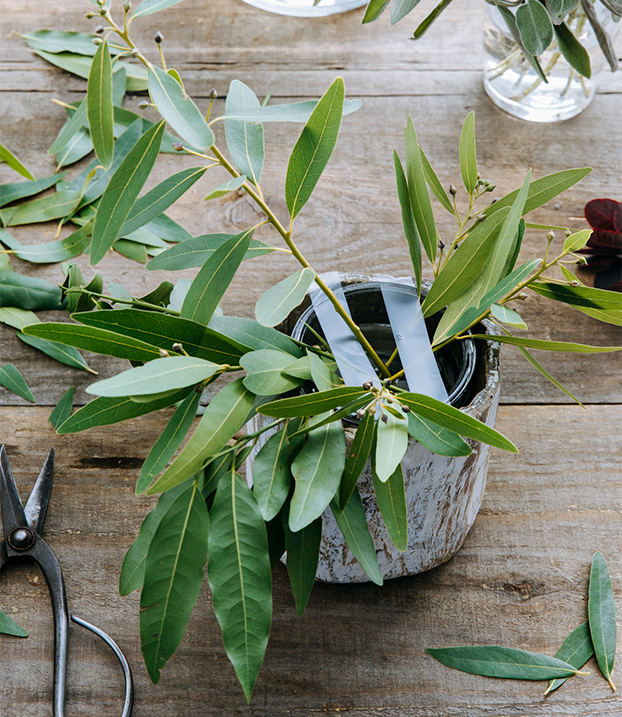
Make It Green
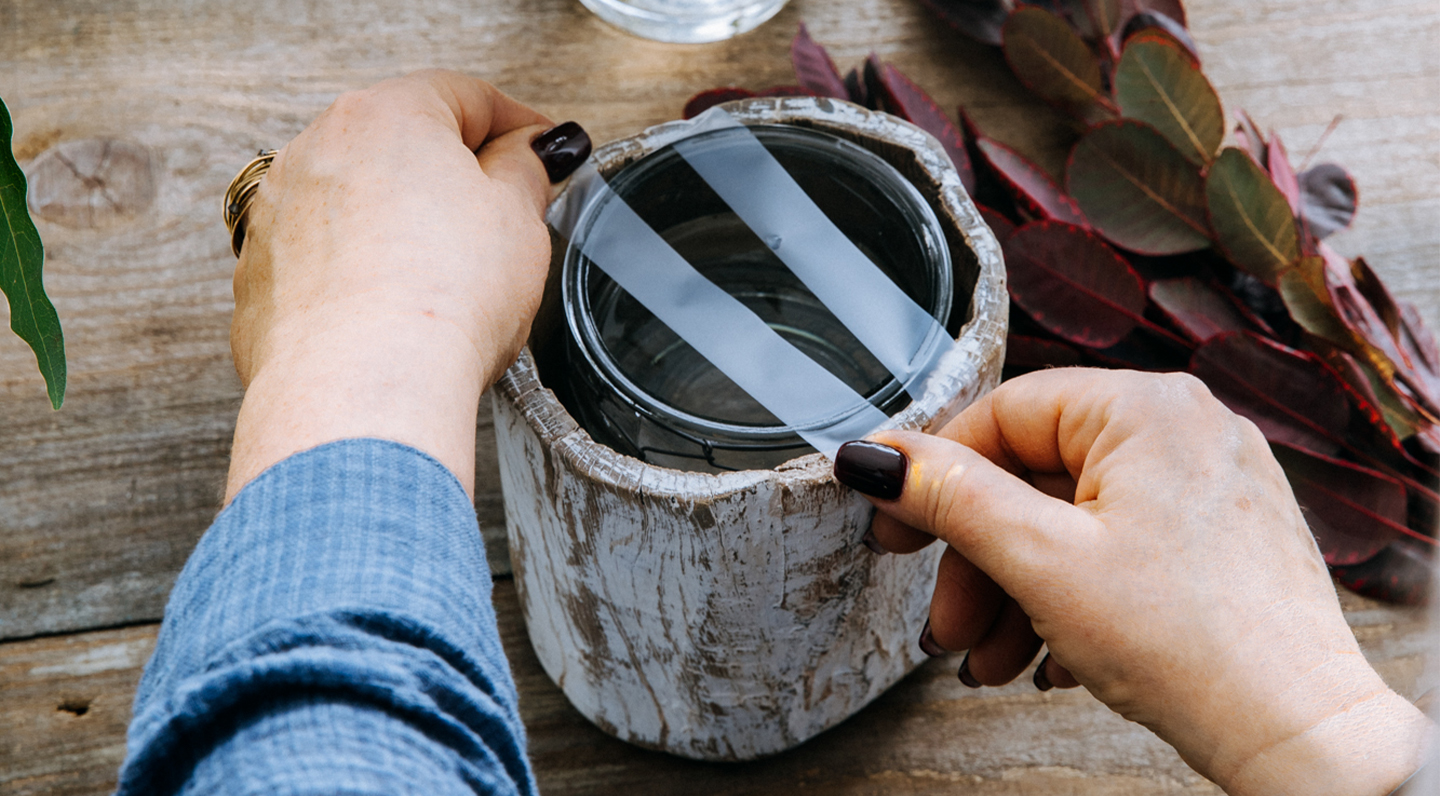
And eco-friendly! Traditional flower foam is contains known carcinogens, bad for the environment, and even flowers don’t like it. If you’re using a non-traditional vessel, like the antique honeypots we used here, put a smaller glass vessel inside to hold water, and then use tape to create a grid to help keep your flowers and greens in place, rather than using toxic flower foam. The larger your vessel opening, the more tape you’ll use. We only needed two parallel pieces for ours. After your tape is in place, fill your vessel with water.
Create the Base
Traditional floral arrangements are built like a triangle. But we’re not traditionalists here, so Erin suggested turning the triangle upside-down for a more organic, asymmetrical look. Creating the base is when you’ll “green it up,” as Erin says. Start by filling your vessel with all of your greens. Keep things looking natural, loose, and even a bit wild.
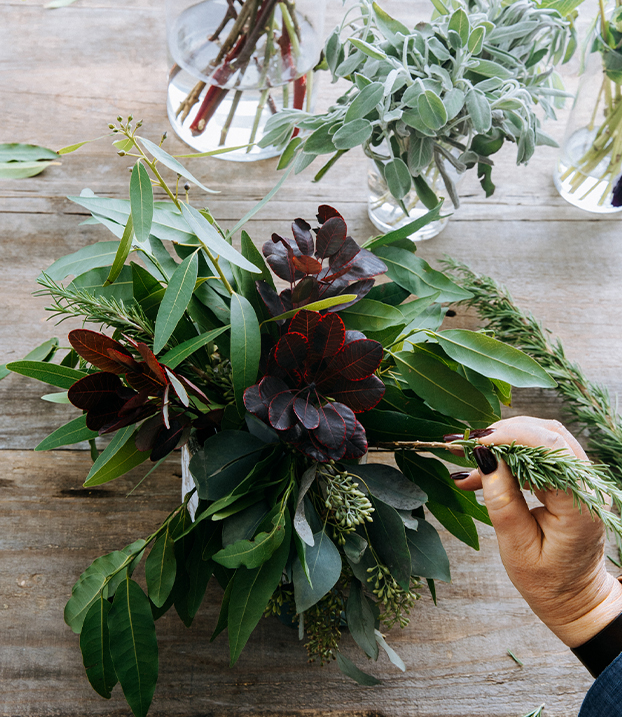
People have a tendency to use darker colors at the bottom of their arrangement and lighter ones at the top. Don’t do this! Use light colors down deep too for added dimension. It’s like putting on makeup—you want layers of color for dimension rather than keeping all the same shades together. This goes for creating your base of greens and for your flowers.


Arrange the Flowers
Now it’s time to add your blooms. Start with the largest heads first, then work your way down in size, ending with the smallest. Work with positive and negative space by placing some flowers up high, some down low. Instead of focusing on balance, asymmetry gives you the most aesthetically-pleasing results, so go with odd numbers of each flower type, not even.
The beautiful thing about arranging flowers is that you can edit. When you’re working up close, it can be hard to see the overall picture of what you’re creating. If you’re feeling uncertain, you can put your arrangement on your dining room table to see how it looks when you’re standing in the room and when you sit down at the table. Make adjustments as needed, but this is not the time to be a perfectionist. Remember: you want asymmetry and imperfection. Wabi-sabi, fam.


Add the Finishing Touches
Rather than setting the table with a runner, as we did with our Thanksgiving centerpiece, Erin laid evergreen branches along the center of the table for a similar effect. We placed our holiday flower arrangements on the greens, then placed some persimmons between them for an organic, farm-to-table vibe.


To keep your DIY holiday centerpiece alive long after the festivities, change out the water every three days and remove any flowers that have wilted, greens that have become slimy, or anything else that’s looking less-than-fresh. Happy holidays!
* You can get more of Erin’s tips, tricks, and inspo by following White Fig Designs on Instagram.


